Successful ecommerce business ownership has never been easier than it is today. Shopify makes your entry into the multi-billion dollar industry effortless. No more developers, no more wasted time on plugins, and definitely no more wondering if you got things right. Follow along as we talk about how you can sell your products online using Shopify in as little as one hour.
The Investment Needed to Build a Shopify Website
Shopify doesn’t require a ton of technical knowledge to get started. You just have to know what your business idea is, then you can select your Shopify plan and get to building your site. Initial sign-up takes all of ten minutes.
It’s important to know what you’re willing to pay. There are plans for beginners, medium-sized businesses already bringing in sales, and big, heavy-hitter stores that need additional reporting and resources.
This post will focus on helping first-time sellers get started on Shopify. Pricing ranges from $39 to $399 a month, but you do get a free three-day trial that gives you some time to pick the plan that works for your ecommerce business.
10 Steps to Creating Your Shopify Website
You don’t need to be a tech wizard to do this, just follow these 10 steps. Anybody can start selling online through Shopify, from young entrepreneurs to stay-at-home moms and retirees setting up an extra income stream.
Step 1 – Create Your Shopify Account
The first thing you need to do is create your Shopify account. The platform is user-friendly, clear, and simple to follow.
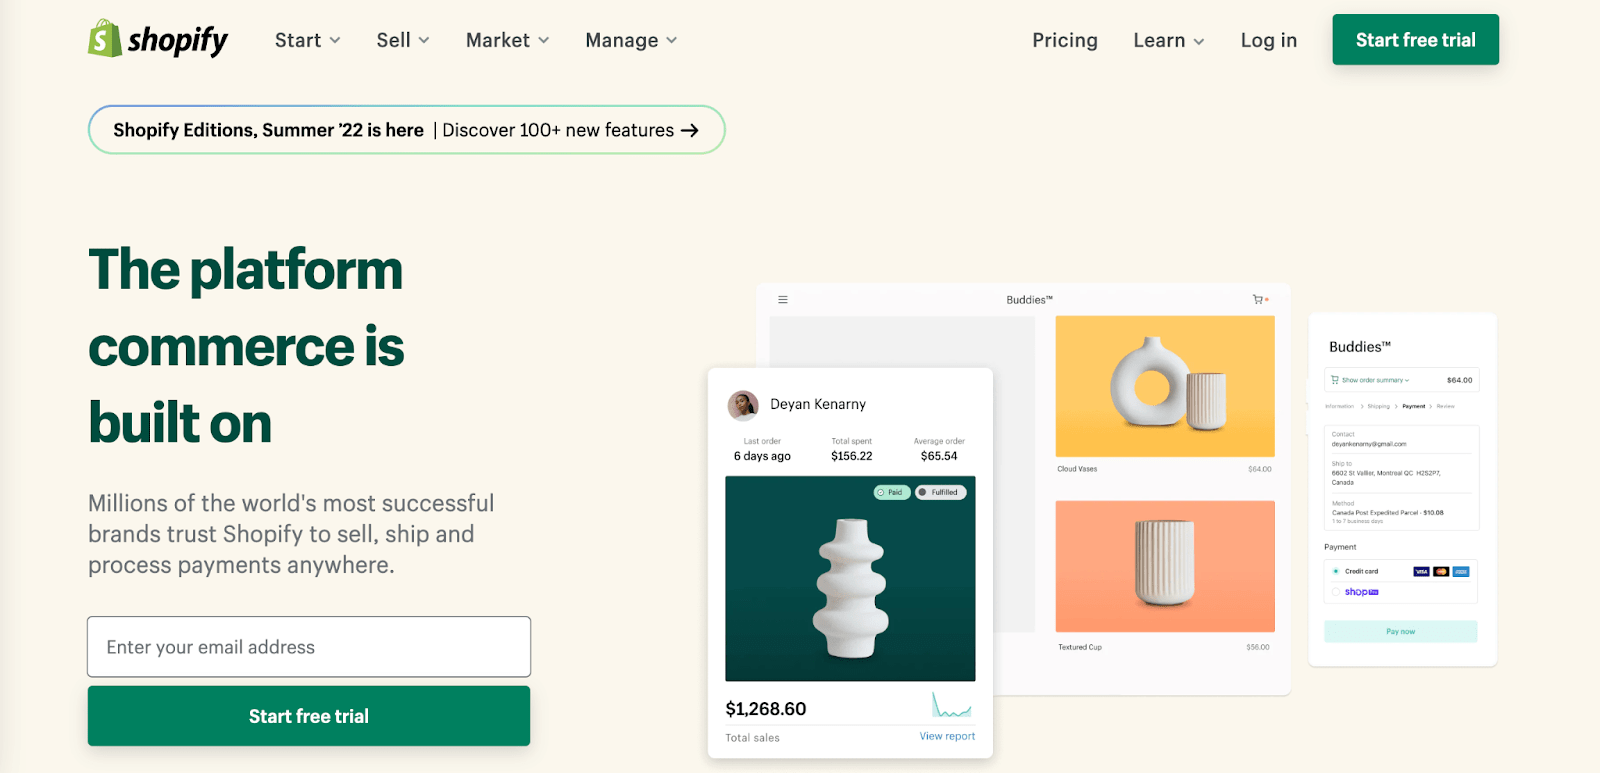
Go to Shopify.com and click on Start free trial in the upper right-hand corner.
Then, enter your email, password, and the store name you want to use. The store name you choose will become your primary domain. After that, click on the button that says Create your store.
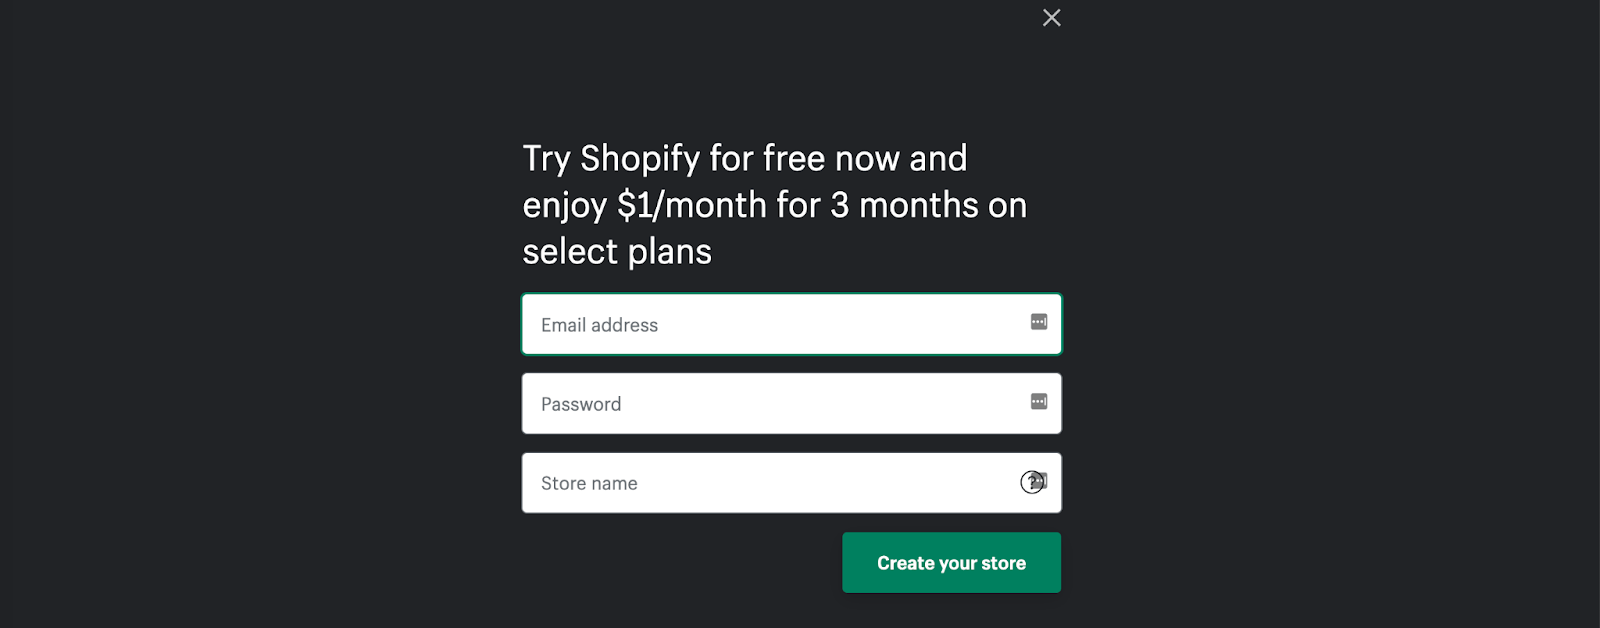
Make sure you save this info somewhere because you will need it to log into your account. You can set up a custom domain later, either through Shopify, purchasing one on your own, or transferring a domain from an existing site. There are resources that help you set that up when you’re ready.
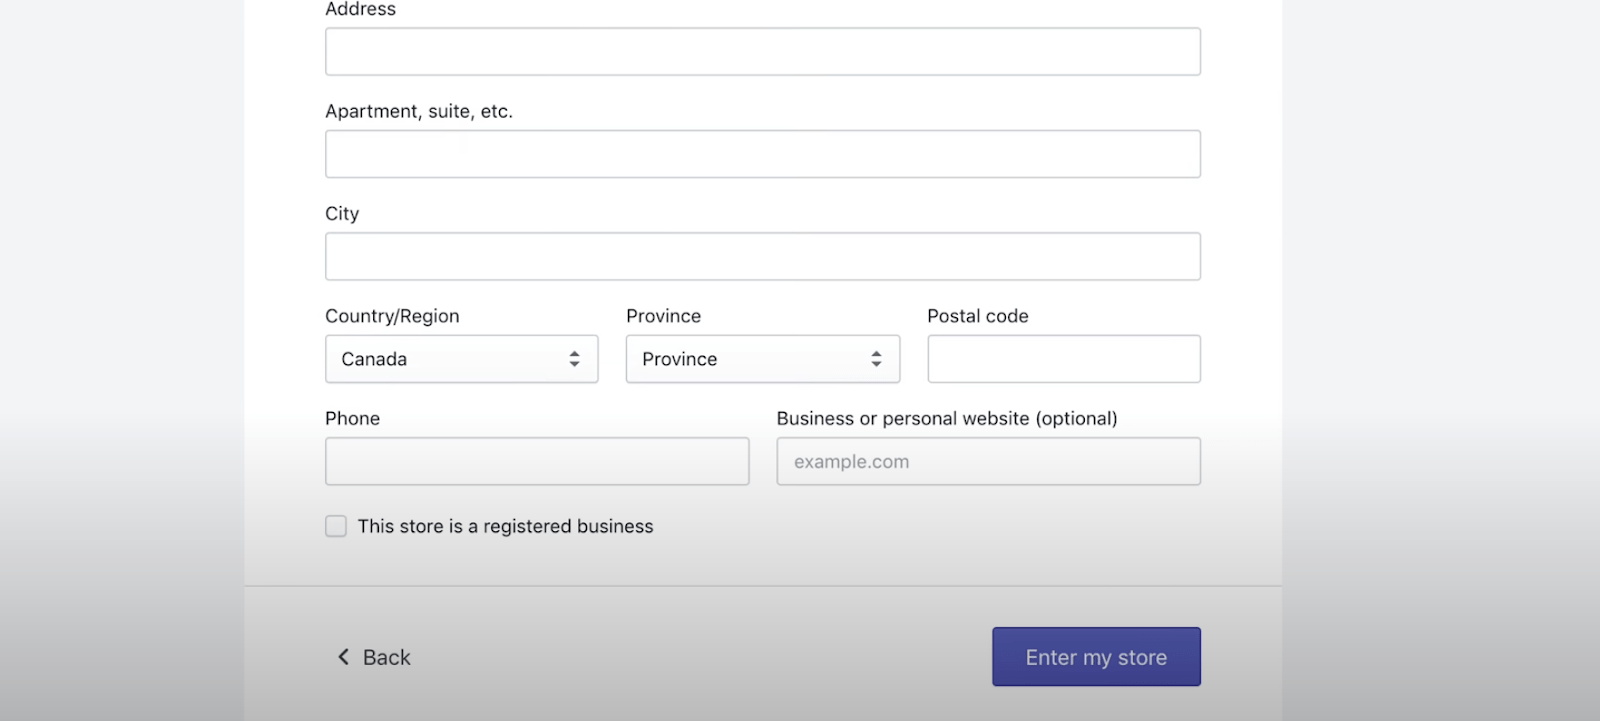
Next, you’ll be asked a bunch of questions about your store. Fill those out, and once you’re done, click the button at the bottom of the page that says Enter my store.
Step 2 – Set Up Your Shopify Store
Once you get into your store, you will see a menu on the left that includes links to all your Shopify store tools and features, like orders, products, and customers.
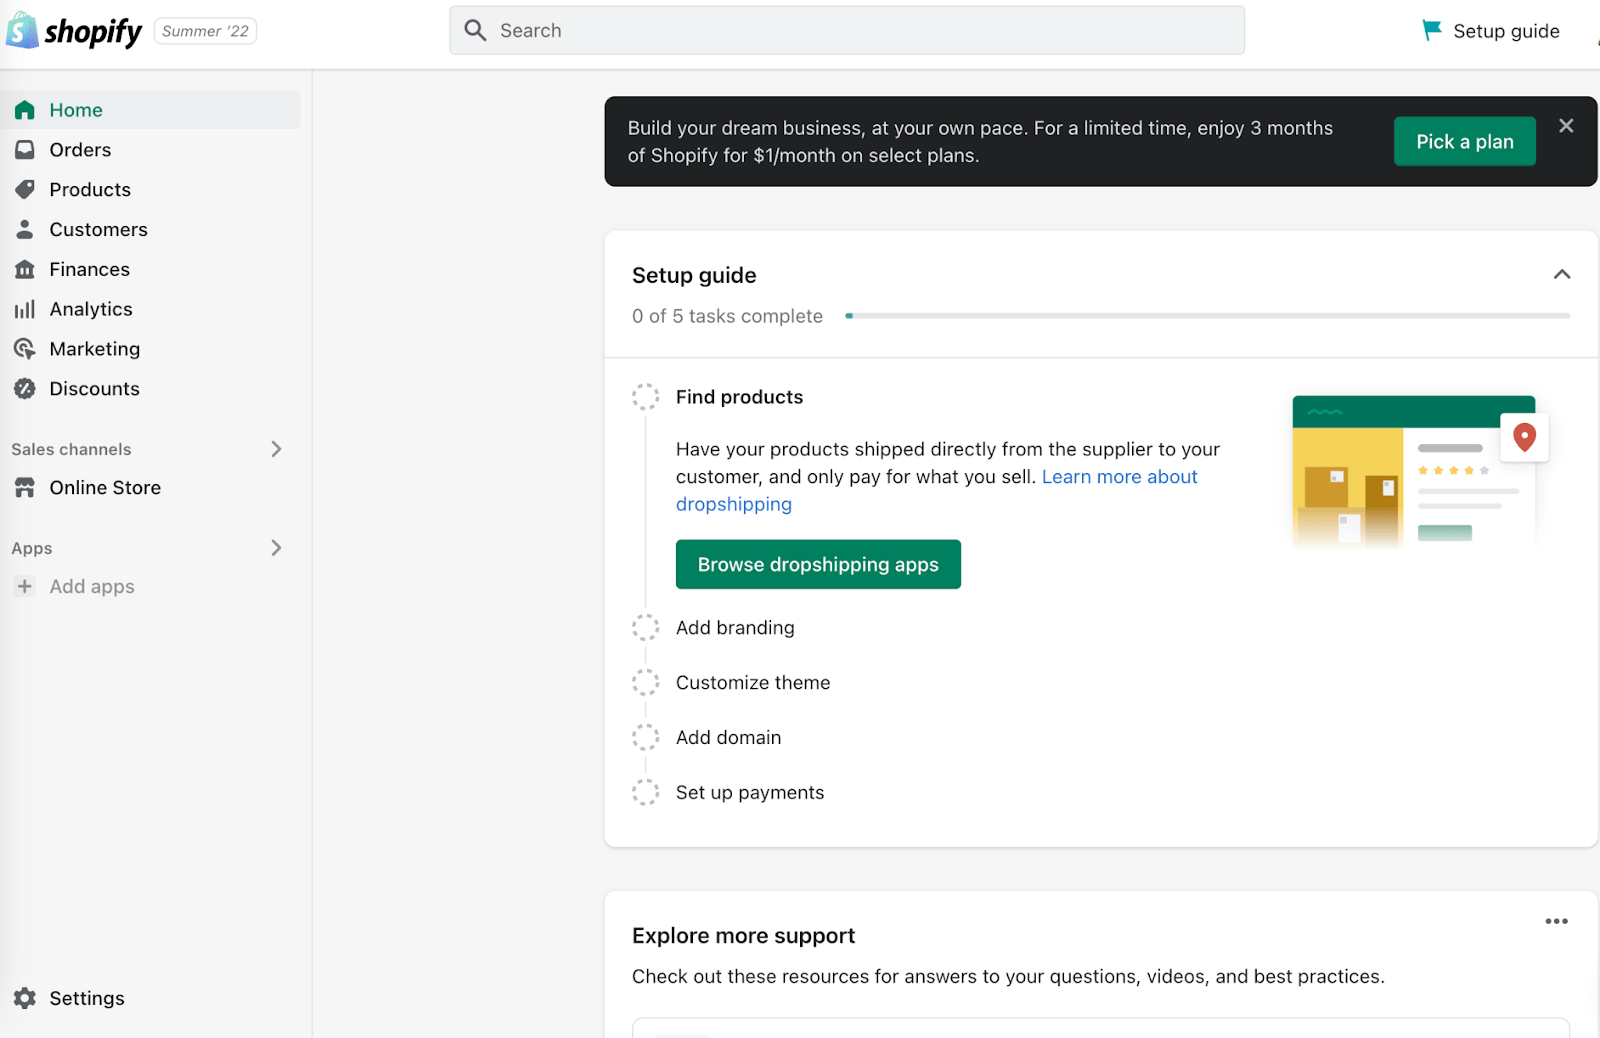
You can see there is a settings button at the bottom left. There, you can change your store name, set up your time zone, and select your currency, among other options.
Once you set up your primary settings, it’s time for the fun stuff.
Step 3 – Choose Your Theme
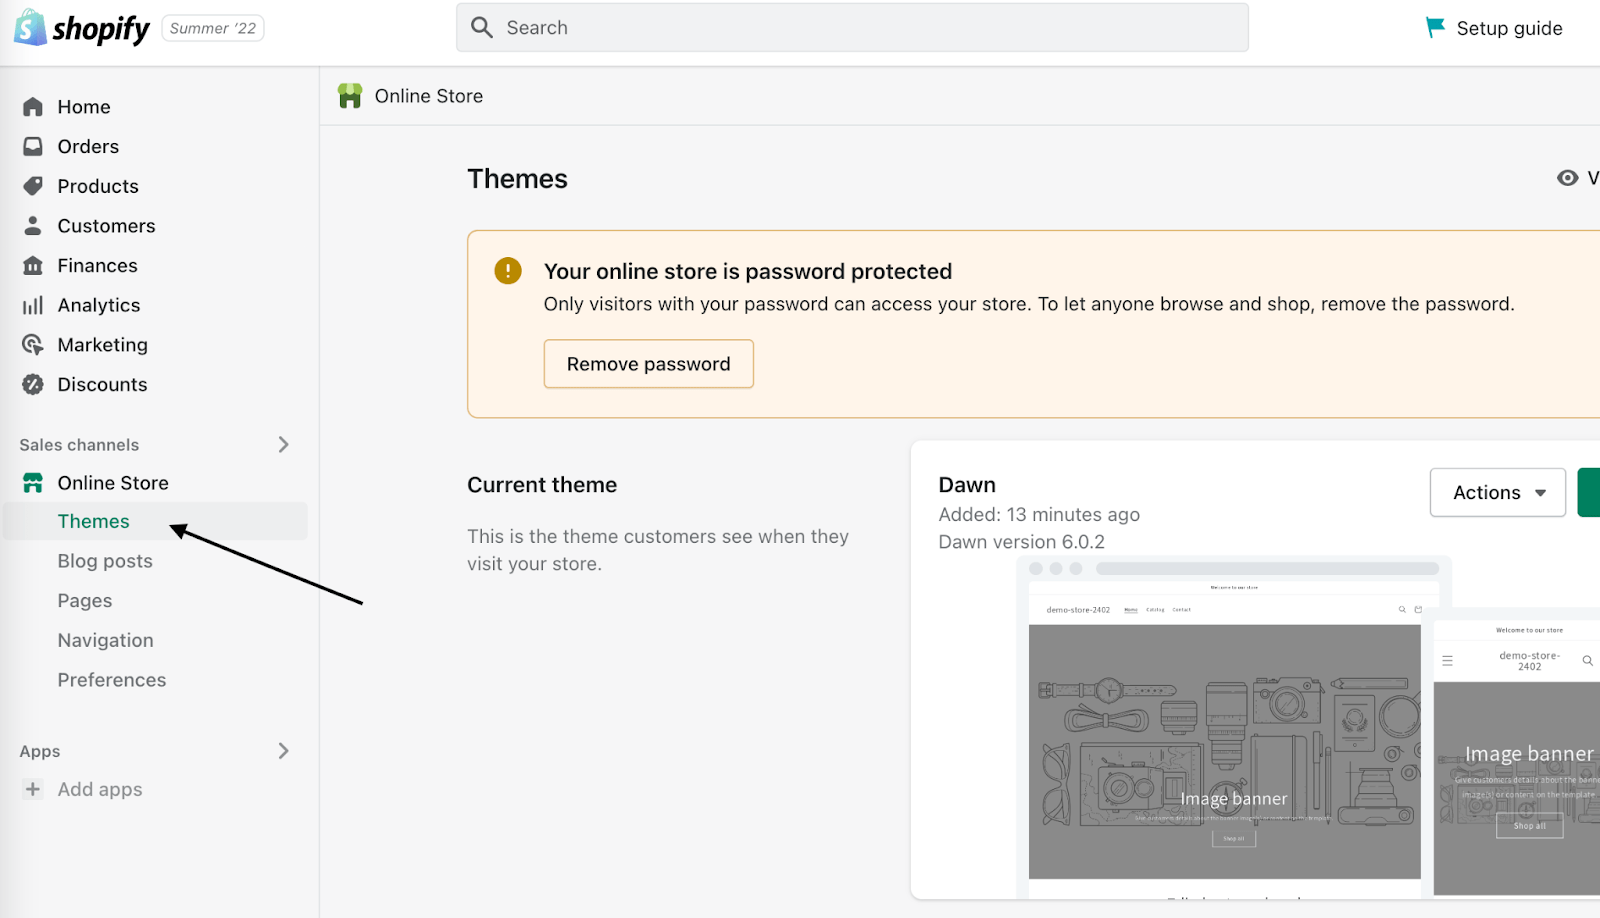
When you first set up your store you are given a default theme. If you want to add a new theme to give your web store a unique, fresh look, just click on the Online Store link in the left-hand sidebar under Sales channels.
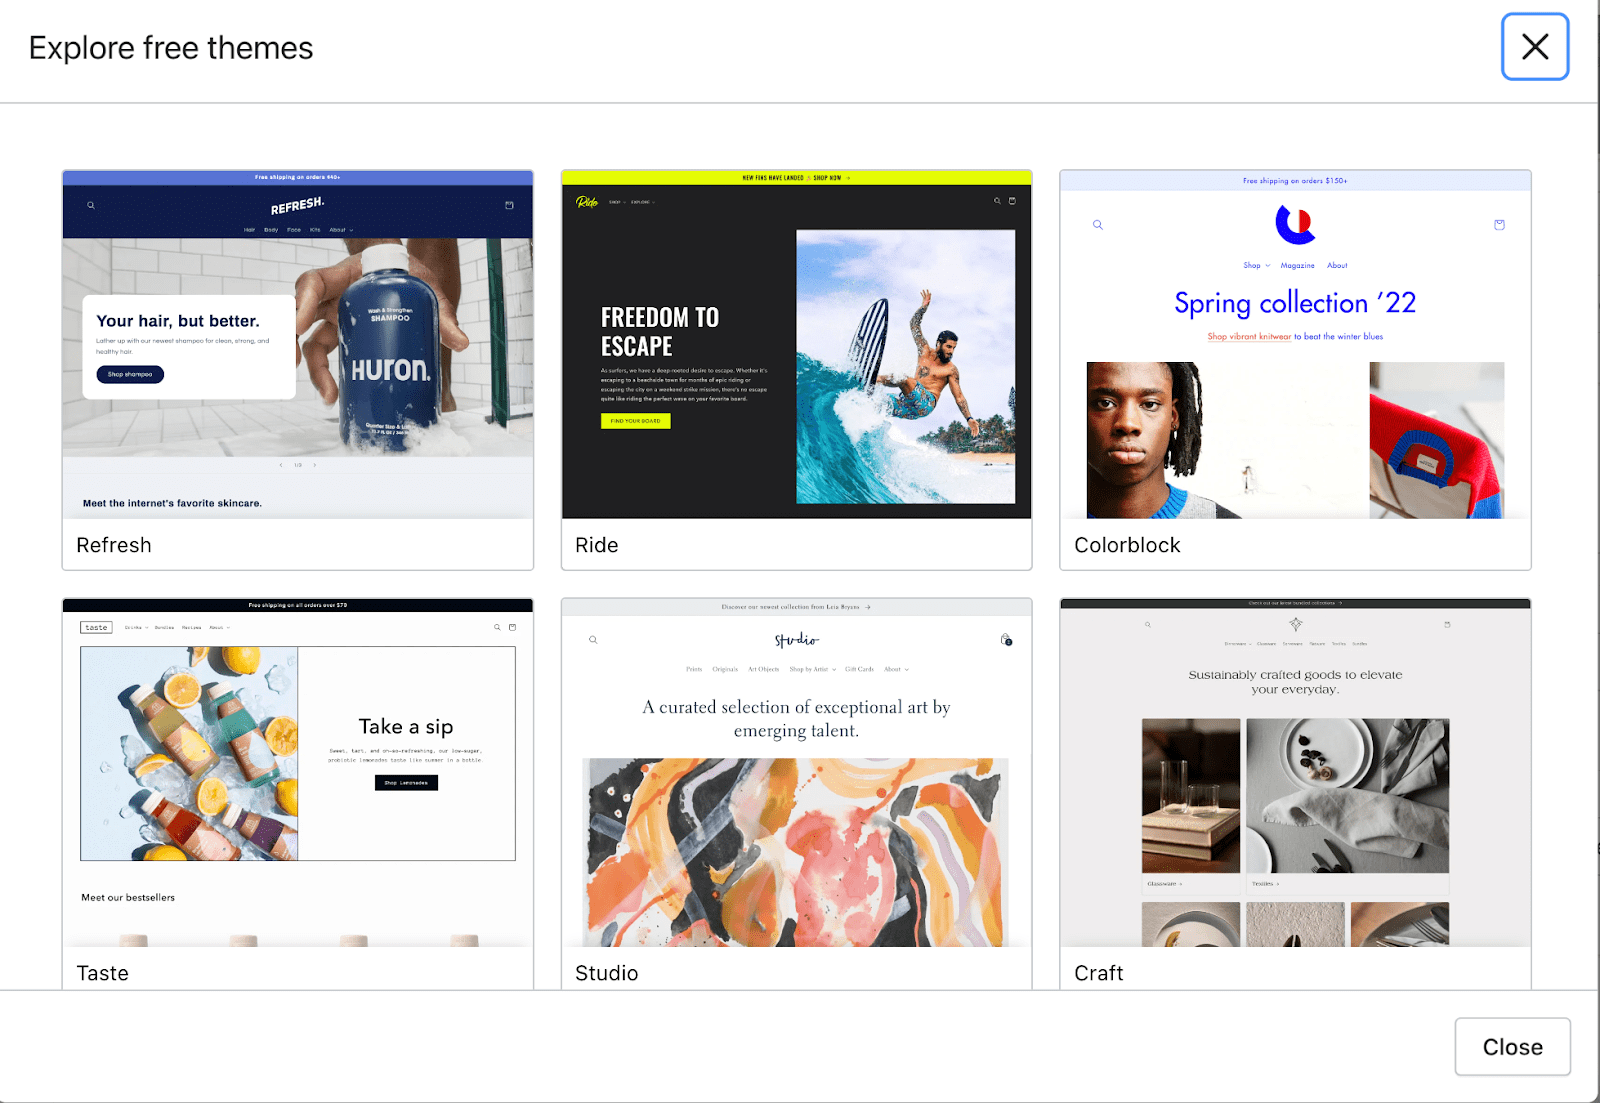
Scroll down and click on Explore free themes to browse through designs that won’t cost you anything to add to your store.

The cool thing about Shopify themes is that some are optimized for specific industries, with features and layouts tailored for retail, restaurants, and other business types. You can choose what works for you based on your needs.
There are also premium themes that cost a bit to use. Below the Free themes option on your dashboard, you’ll see an option where you can click Visit Theme Store to find the paid themes.
Either way, when picking a theme, you want to pay attention to the details in order to make sure it’s a good fit for your store.
There’s also a reviews section so you can see what others who purchased the theme love and hate about it.
A big difference that Shopify provides that other ecommerce site builders don’t is a library of existing Shopify stores that already use each theme. You can get a picture-perfect view of the potential for your store that way, plus see how all the different features look and feel on an actual web store.
Step 4 – Edit the Look and Feel
Making your online store uniquely your own is crucial to standing out and ensuring the best customer experience possible.
If you’ve never edited a website before, that’s no problem. Shopify is intuitive and makes your designing process super simple.
You have the capability of making any edits you want to a theme. With that said, it’s best not to spend hours trying to make things look absolutely perfect. It’s a trap that will keep you from moving on to more important things, like actually launching your store and starting to bring in sales.
To edit your store, head back to the online store tab in the left menu bar, then hover over the theme you’ve added and click on Customize.
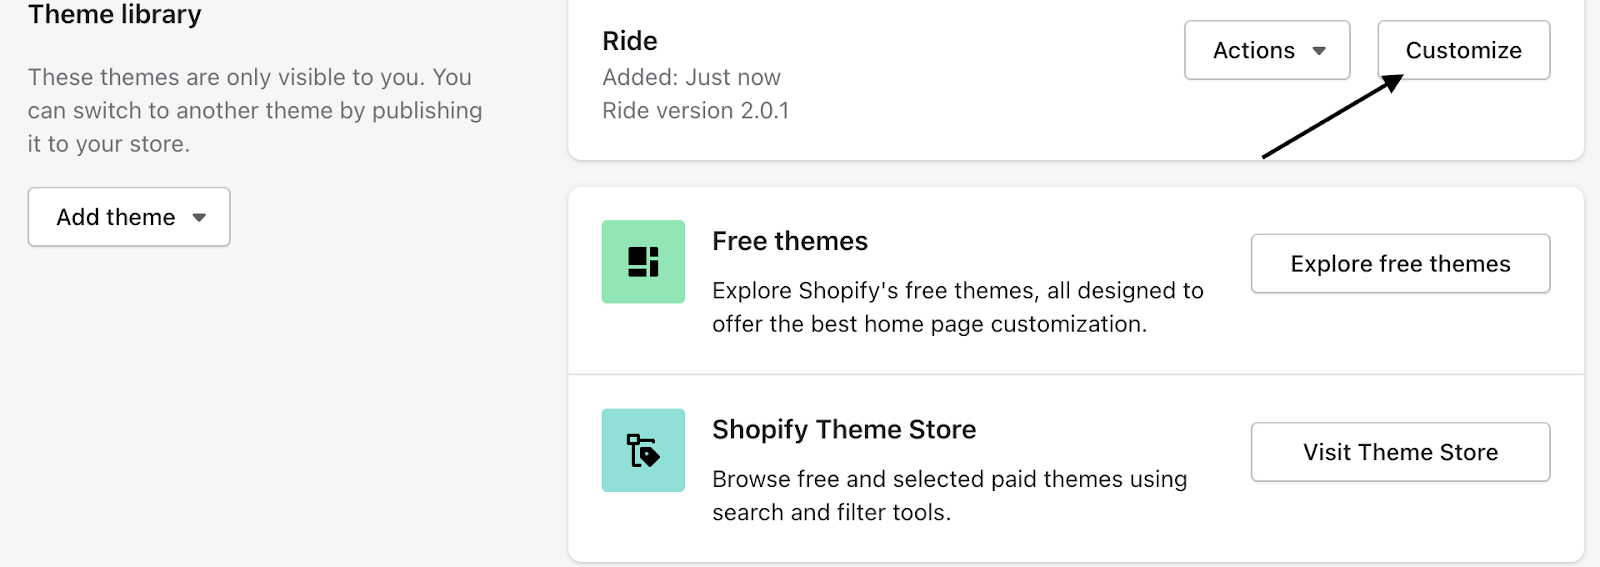
This will open up your online store theme editor in a new window.
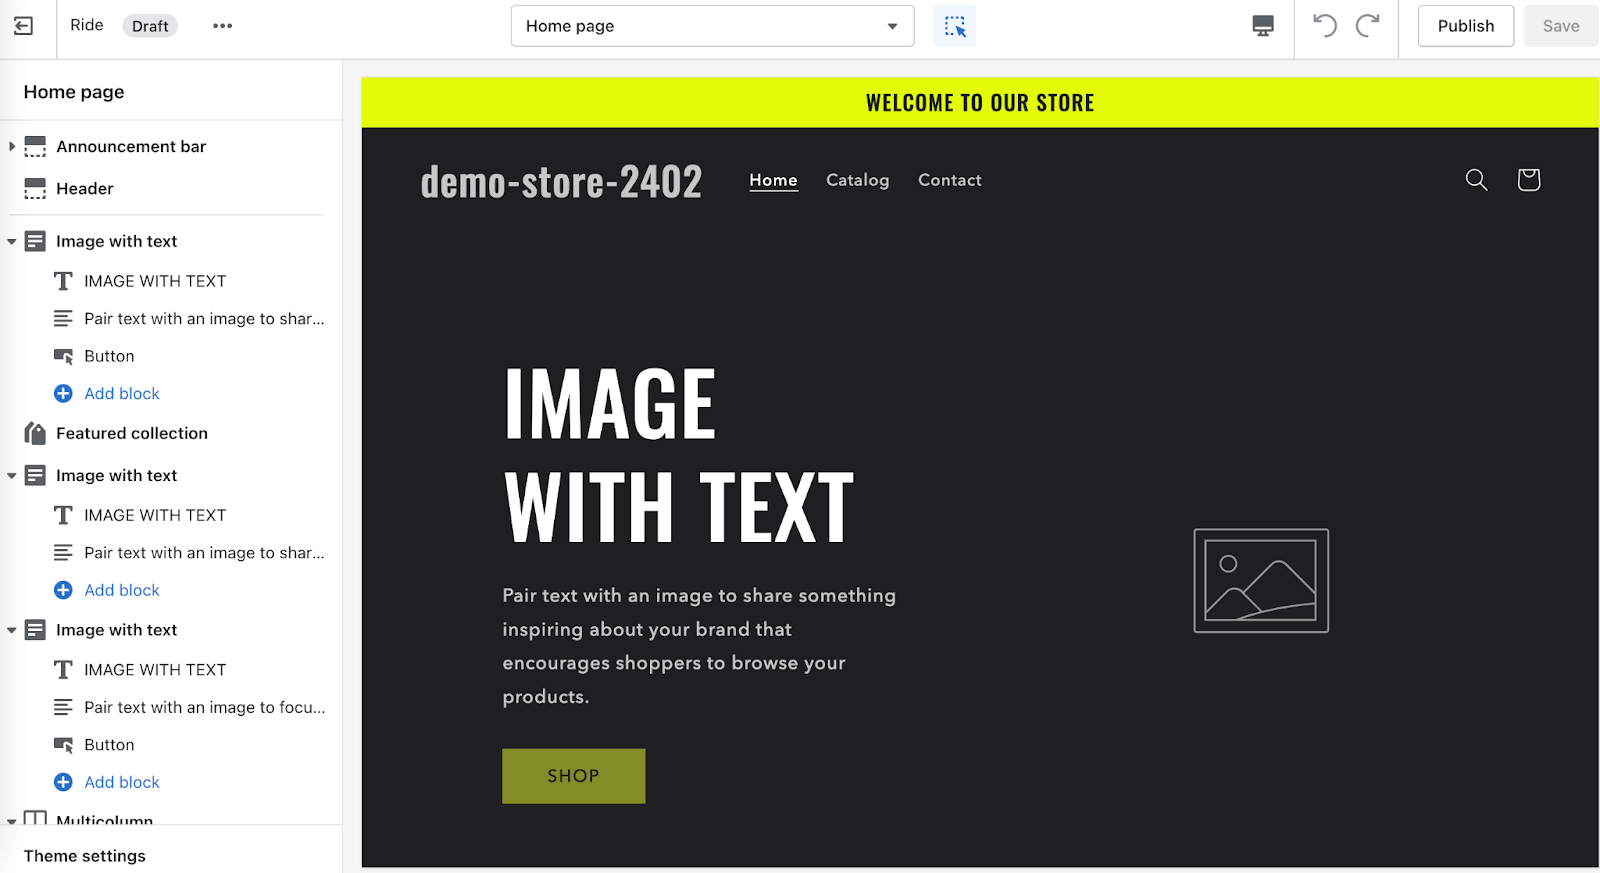
On the left, you’ll see your tools where you can change text, add buttons, add custom images, and more. On the right-hand side, you have a live view of how your store will actually look as you make those changes.
Hover over a section to see the blue boundary of an element. Then, click it, and that section will be activated.
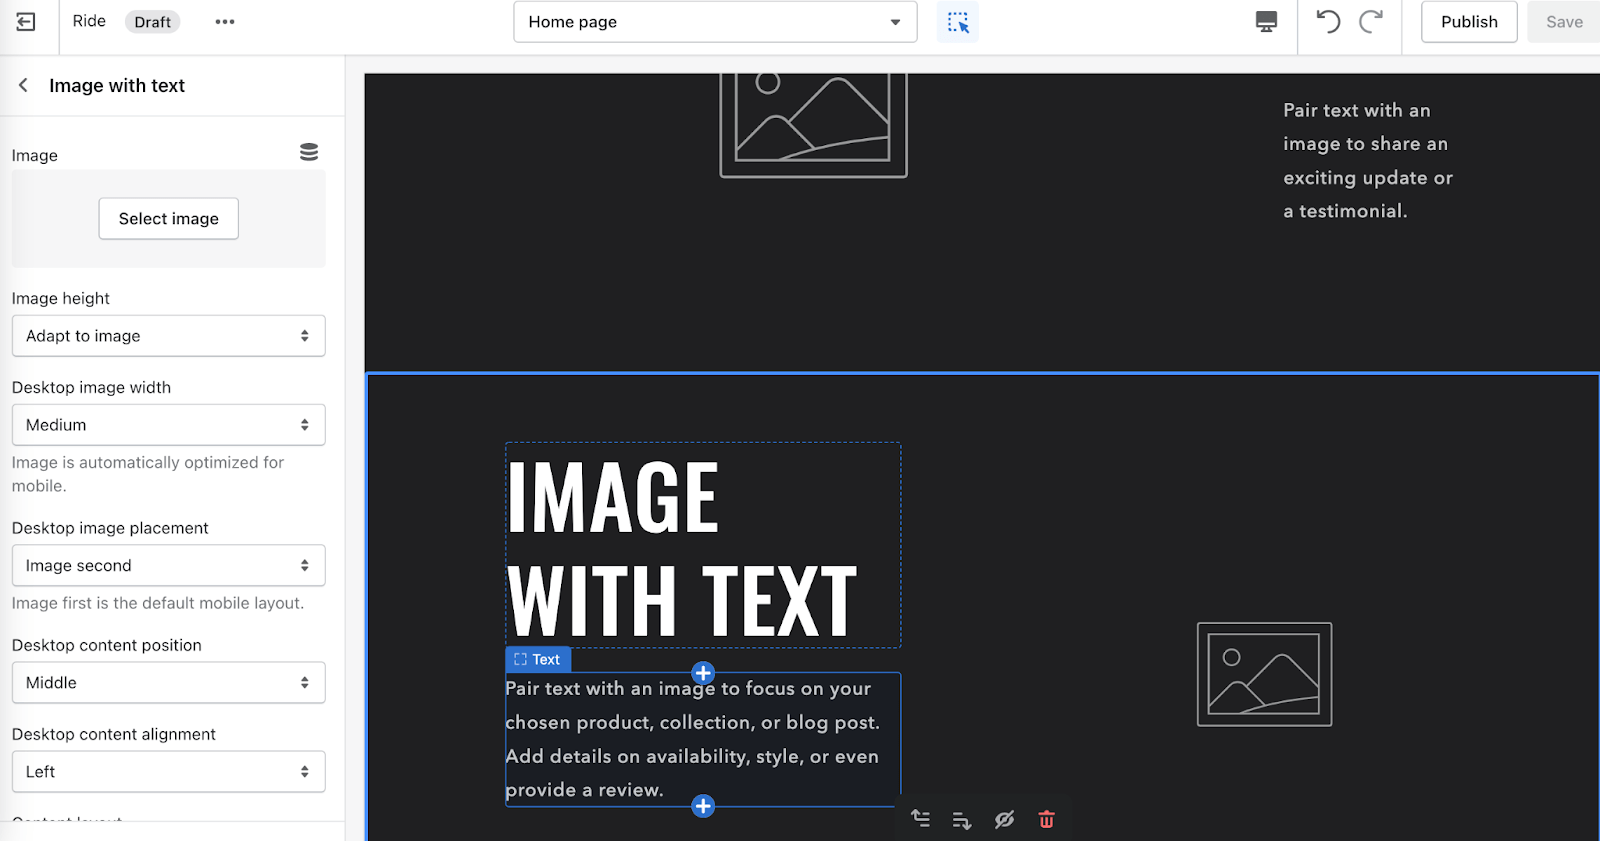
This format prevents errors that drag-and-dropping elements can cause and helps you move quickly as you design and adjust.
Once you’re done, it’s time to add the moneymaker: your products and services.
Step 5 – Add Your Products and Services
Once your site design is in a good place, it’s time to start putting your products or services onto your site for your visitors to purchase.
To get started, you’ll have to leave the design editor by clicking the exit icon at the top left corner of the page. This will bring you back to your main Shopify admin dashboard.

Once you’re back on the admin screen, move to the left-side navigation bar and click on the Products link (third from the top).
This takes you to your products page. In the middle of the page, there is an Add your products button.
And, even if you don’t know what to sell you right now, you can actually find products from here as well.
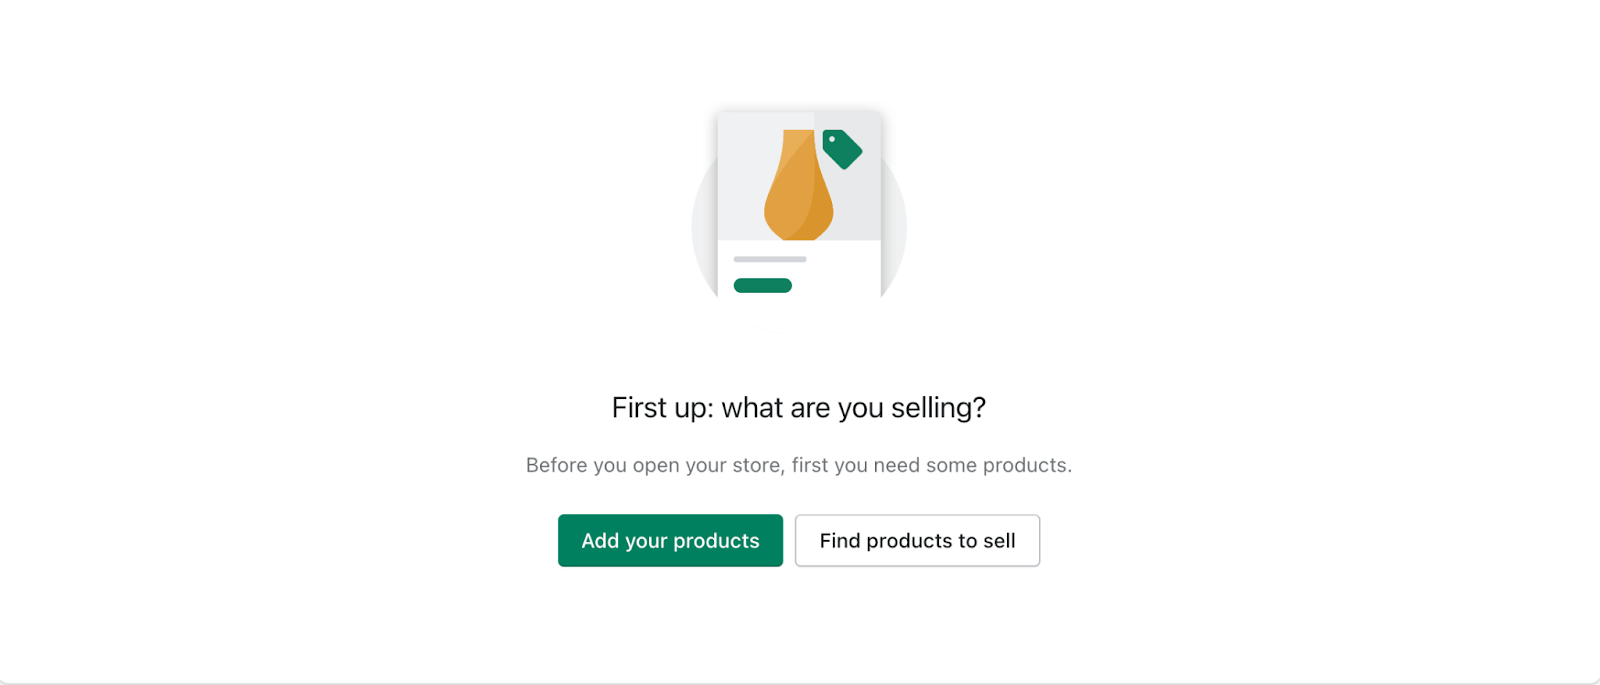
Clicking Add your products opens a full page for your first product that allows you to add a title, description, product type, price, images, and much more.
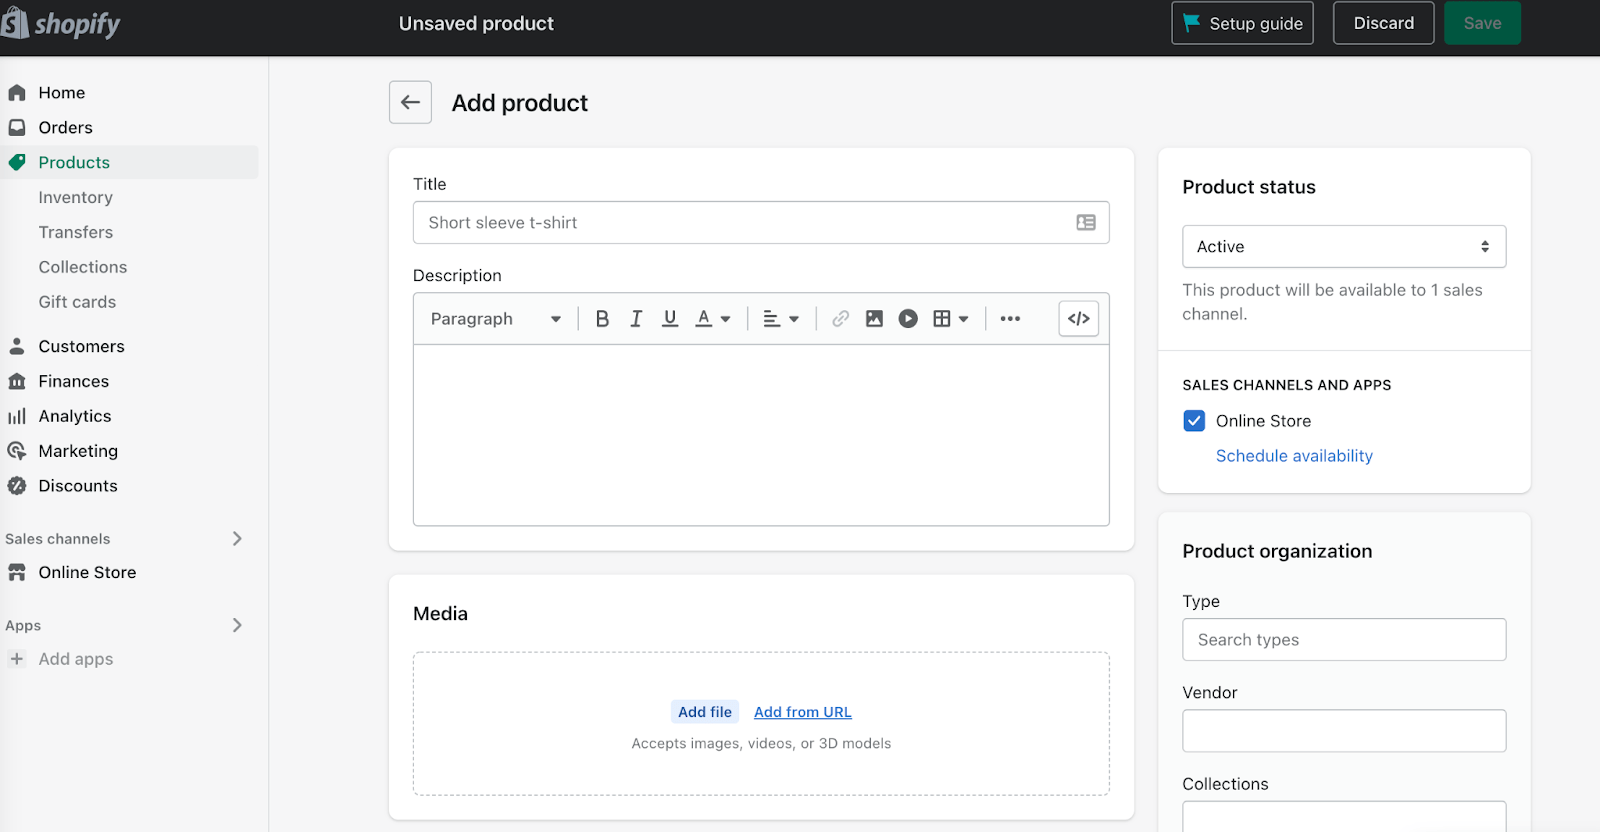
The process is straightforward, and by following the page down in order it’s very hard to make mistakes. Just another reason Shopify is the top choice for creating an ecommerce business.
After you’ve done your first, just rinse and repeat for each of your products or services.
Step 6 – Organize Your Products
You might have multiple products and services, like t-shirts, accessories, coaching packages, and more. To keep things organized, you can group them into different categories or collections.
This is an important step because the easier you make it for your customers to find what they are looking for, the more likely they are to buy from you.
To set this up, go back to your Shopify admin page. Click Products, then click on the Collections link.
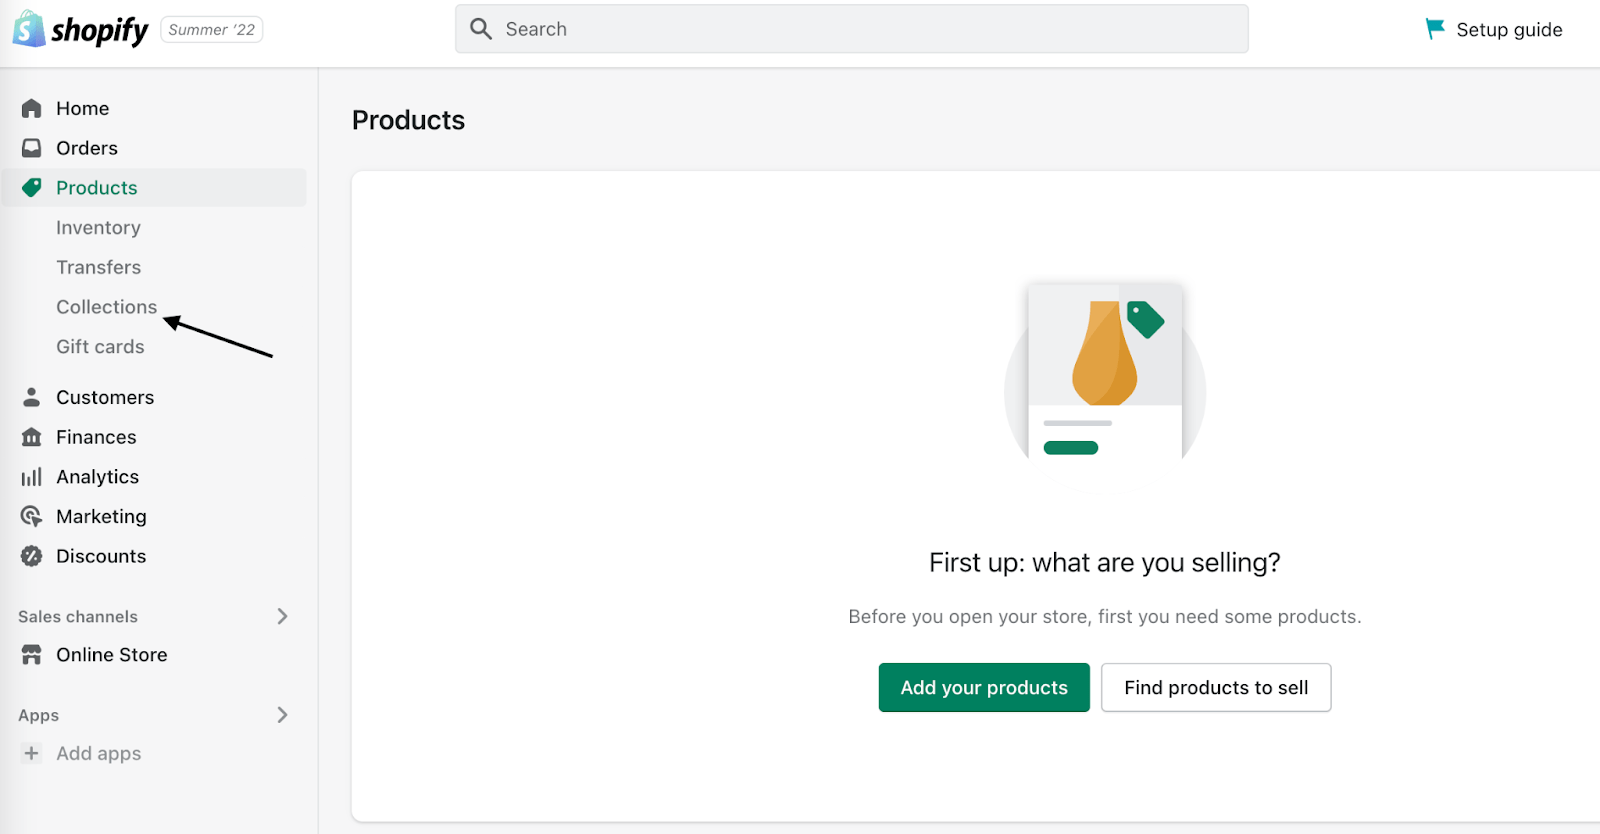
Once on the collections page, click on the Create collection button in the upper right corner of the page.

There, add your collection title and all other details you want to include about your product groups. You can even set Shopify to automatically add products to this collection if they match certain conditions.
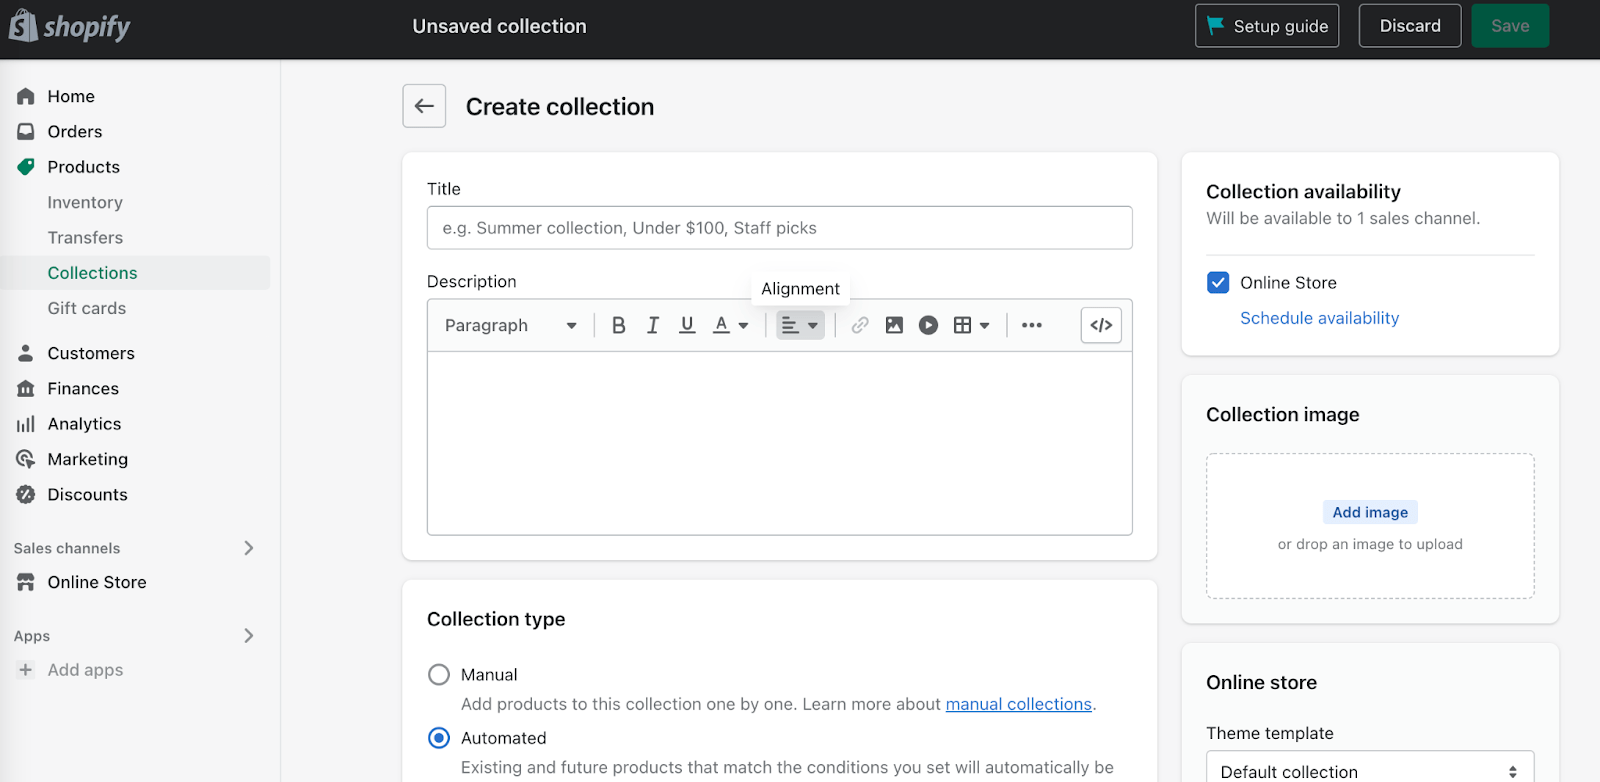
If you utilize product collections, make sure you pick a theme that allows you to add an image to represent your collections. It adds a professional touch to your store.
Now, let’s talk about email.
Step 7 – Set Up Your Shopify Store Email
Coupons, giveaways, contests, and keeping up-to-date with the status of customer requests all have one thing in common: business-based email. So, when you need to communicate with your customers, email is most likely how you’ll do it.
And emails are not just for your customers. You can have notifications sent to you and your staff if you have employees.
Email comes with any Shopify plan. You’ll just need to set a few things up.
In your Shopify admin dashboard, click on Settings to go to your settings page.
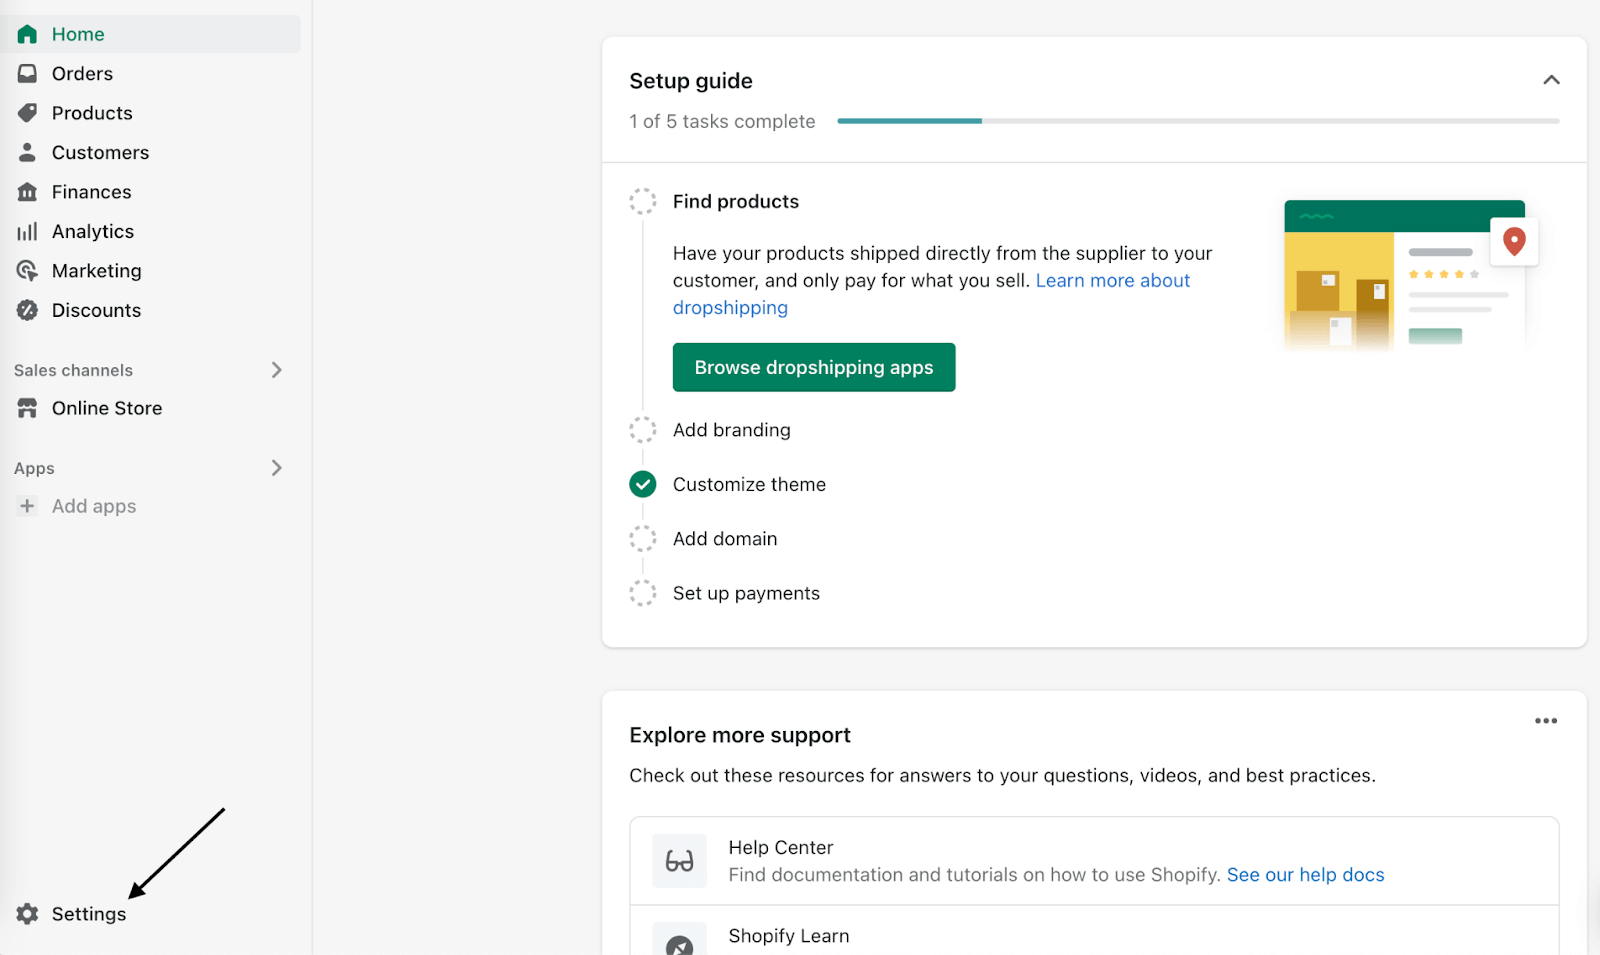
Then you will see your settings dashboard. Scroll down to contact information, where you will see a link that says View email settings.

Click on that link, and you will be taken to the sender email options.
Sender email is what your customers see after an order has been made or when you send marketing emails.
Here, you’ll set the email address you want to show up for all your marketing material for your customers. You can use the email address for your Shopify store domain or another one you own.
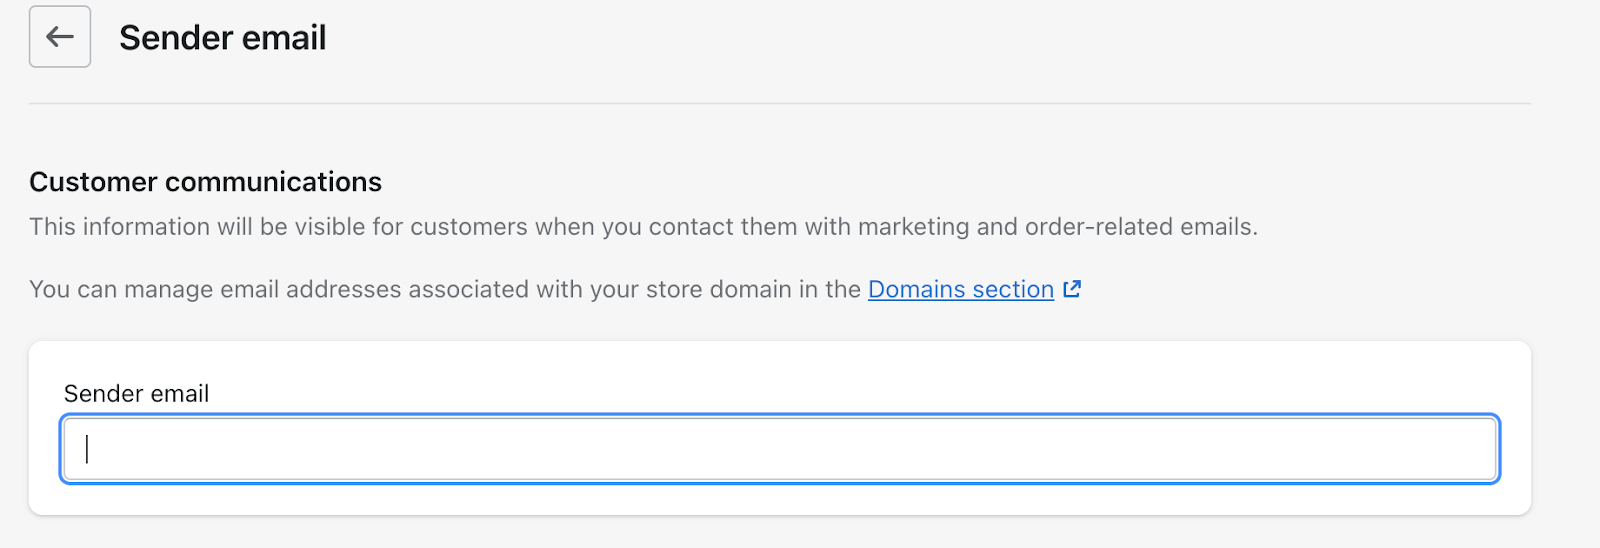
Once updated, hit the save button in the upper right corner of the page.
Next, set up Shopify email notifications for customers. Going back to your settings page, scroll down to Notifications in the left menu bar and click that to set the content and design of the emails sent to customers.
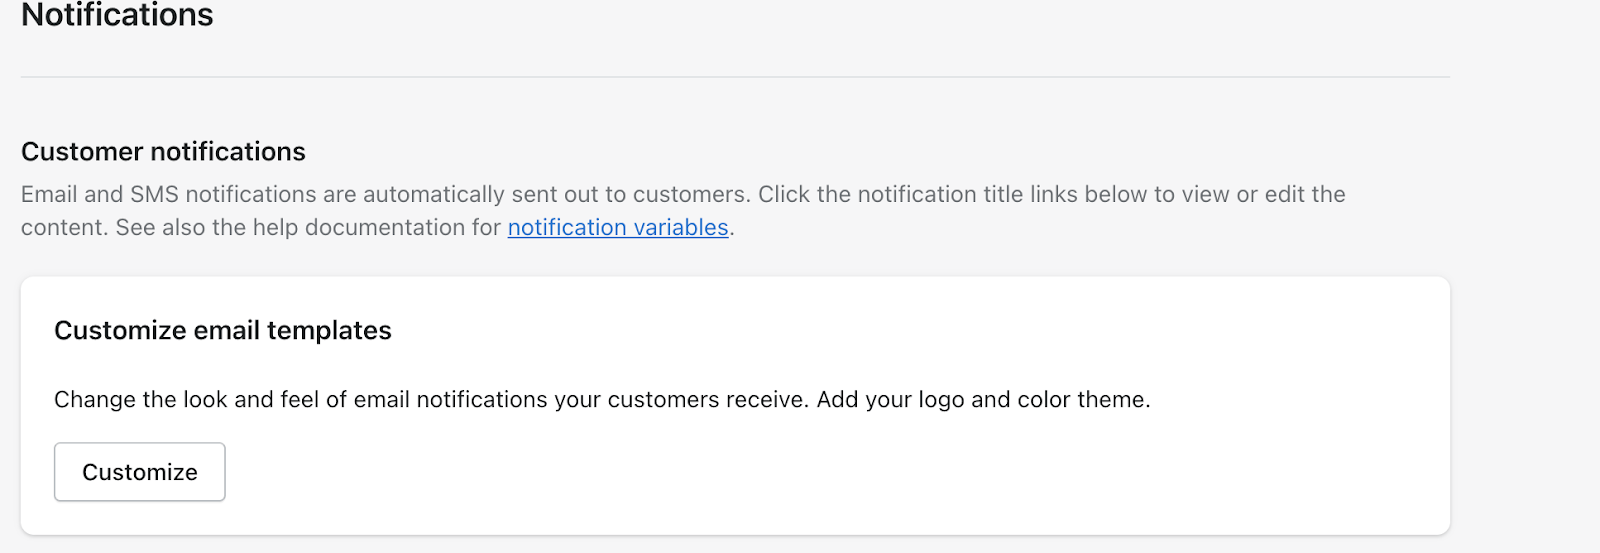
There are several types of email notifications you can edit, from order fulfillment to shipping updates, cancellations, and more.
Step 8 – Set Up Your Payment Options
Here’s the last big step, connecting payment methods to your Shopify store.
Go to your Shopify admin dashboard, click on Settings, then look for Payments in the left-hand menu bar.
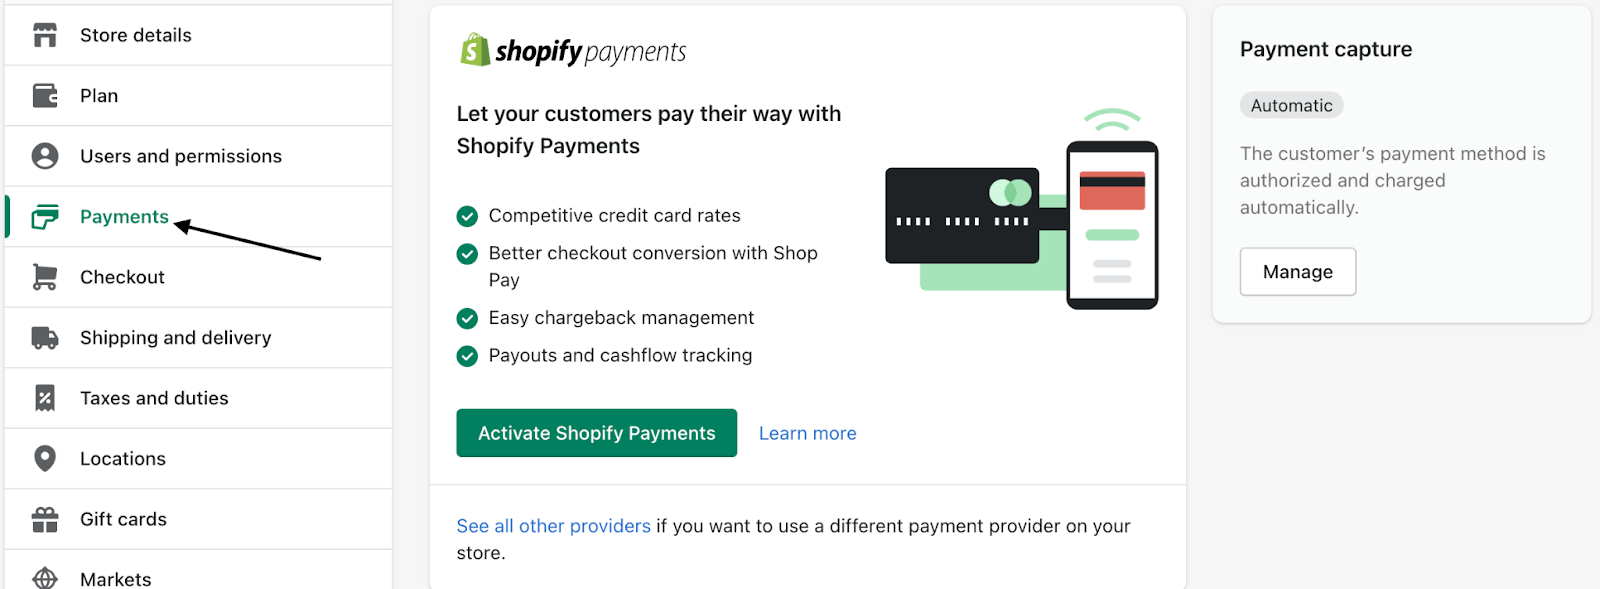
From this screen, click on Activate Shopify Payments and follow the straightforward steps to get it set up on your site. This is the simplest route, but if you want to accept payments with PayPal or another third-party provider, you have that option as well below the button; just click on See all other providers.
Step 9 – Check for Additional Relevant Settings
Last, check for any final aspects you need to include or set, such as pages for legal disclosure, creating regular marketing reports, setting up your online customer strategy, and more. You can find all of these details in the list of options on the settings area sidebar.
Step 10 – Launch Your Store!
You’ve made it. You’ve done the work, and now it’s time to see it pay off. Your site is ready to go and start selling.
Shopify will even help you get started on the right foot. You can set up an initial marketing campaign by clicking Marketing in the left sidebar of your admin dashboard.
This section allows you to create Google and Facebook ads and track how they perform from one place.
Click on Create campaign in the upper right corner.
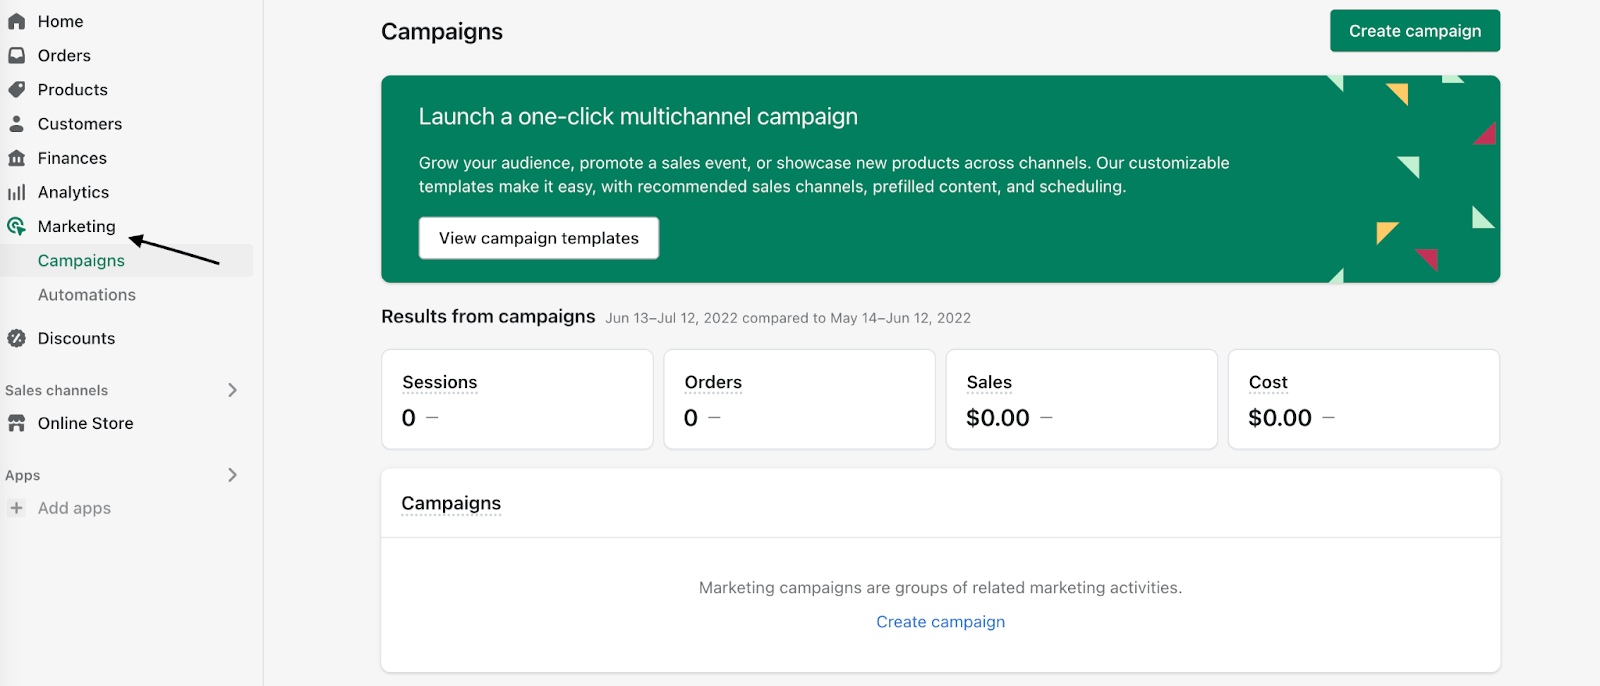
From this screen, you can pick recommended campaign options, including ads, email, or social campaigns. You can even run SMS campaigns on Shopify.
Choose a platform where you like to start marketing your new web store. Whatever method you choose, there will be specific guided steps to follow to get set up. It’s very simple.
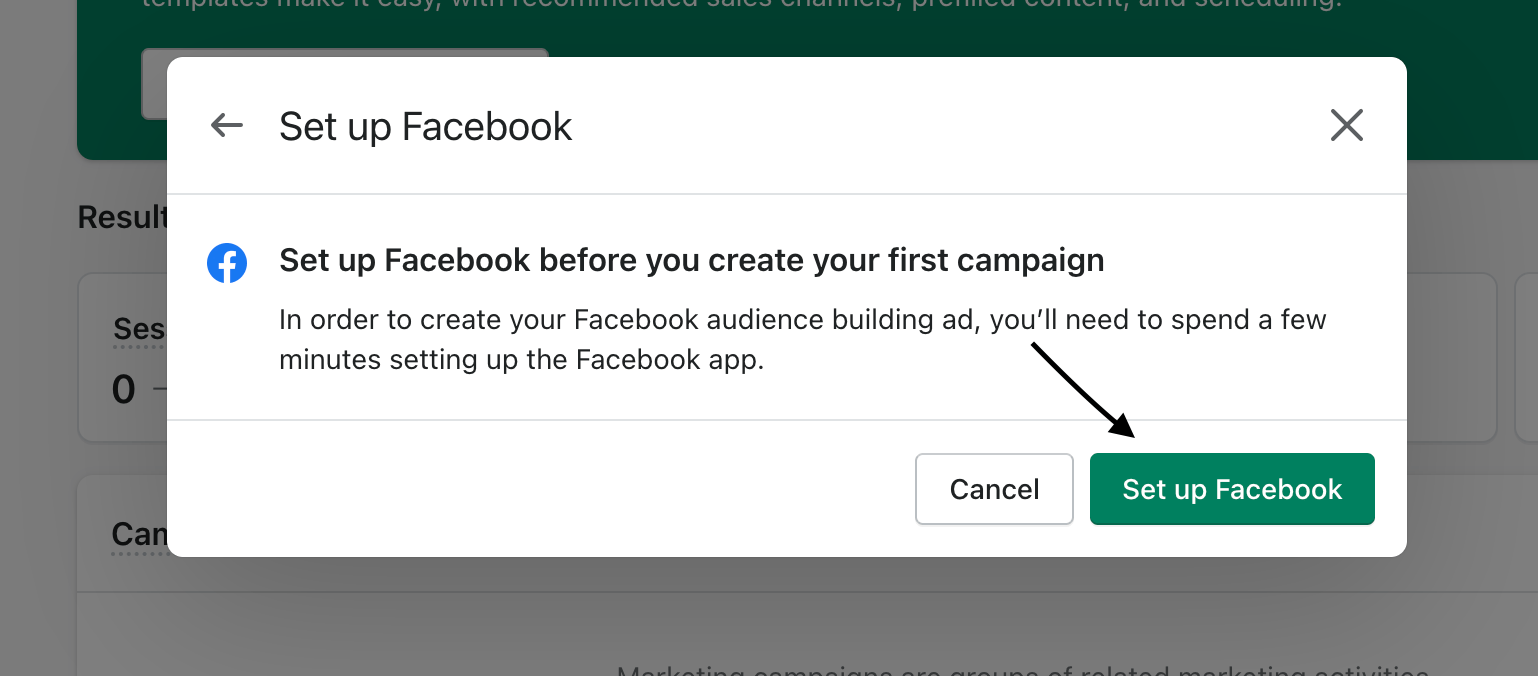
With Shopify marketing, you can also delete, edit, or pause campaigns, plus archive them to quickly re-run campaigns that worked well.
Be realistic here, though. Marketing campaigns take time to learn, so be patient and stick with it.
Next Steps
We recommend taking a look at the massive library that Shopify offers to learn more about how to maximize your new store’s dynamic capabilities. There are blog posts to read, and workshops you can join that will walk you through all the details about Shopify. That can make all the difference in achieving faster results.
But, for now, you’re in good shape. You have a Shopify store up and ready to go and are ready to start selling online to millions of thirsty customers.

